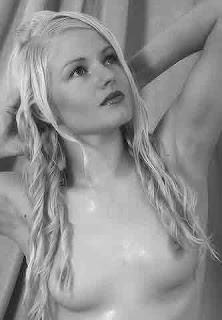
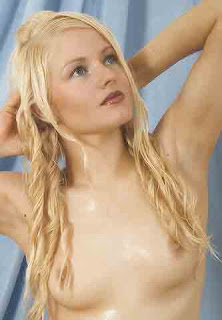
Some of your images may not be acceptable to all-knowing critics, but if they meet your own personal criteria of value, that's exactly what photography is all about. Pour your individuality into your work, be creative, leave wide lanes others rush along and strand into uncharted lands.
If you can manage it, drop all photography courses and schools. Masters in any are not educated at formal institutions. Your individual taste has to be born out of your own personality, even if you lack technique.
Actually, this is no lack, but a hidden treasure. Technique can be mastered by anyone. Your vision cannot.
Whatever methods you may read about here, are thus only an indication of direction you may want to follow. When you do, explore all possibilities to find the results which are unique to you.


Introduction
The myth of post-processing
Image processing software allows deep image manipulation, including recovery of details lost in shadows and reducing overexposure. One may feel tempted to forget the basics of photography and rely on post-processing to obtain acceptable results.
This is not the best way, though, as you will lose a lot of time trying to make a good image out of faulty exposures and, more importantly, you will never learn tricks of the trade which make taking good images a snap.
By all means, try to take properly exposed images right on the spot, so that further use of programs is limited to creativity. Digital tools will help you greatly in this, histograms playing the major role. Experiment, use a variety of exposure settings and check the results. You have them immediate, so learning is easy and the only cost is your time.
There is a message in this introduction. Digital cameras take color images. Conversion to B&W may be difficult or at least time-consuming if you don't take a properly exposed, color-balanced and focused color photo first. On the other hand, when you take a well- balanced color image, you have infinite possibilities ahead for converting it or using as a point of departure for your creativity.
Color to B&W conversion methods
Having said that, we may now proceed to the practical part. The following methods are universally applied in almost all more popular software packages. For clarity reasons, we will use Photoshop commands. If you use a different program, find corresponding functions and options and re-create the procedures.
For comparison purposes, the images in the side column are processed with the described methods, with default settings used. The source was a typical 333x500px website-use full-color image (01).
There are a number of software conversion methods. Grayscale conversion (Image > Mode > Grayscale = 02) is the most straightforward. Use it for previewing images only, as in most cases the resulting grays are flat and images lack contrast and depth. The worst thing is that color channel data are lost irreversibly here, making further adjustments impossible.
Color desaturation is much better ( Image > Adjustments > Desaturate = 03). All color data are still there in the image file, and this is quite a good method to start with.
Hue-Saturation adjustment (Image > Adjustments > Hue/Saturation = 04) loses much of the original data. To make a B&W image, move the Saturation slider to 0.
Gradient application makes use of the standard software option and gives controllable results (Image > Adjustments > Gradient Map... = 05), far better than obtained with other 'simple' methods.
Lab color (Image > Mode > Lab Color = 06) conversion may produce amazing results when the Lightness channel image is taken as the source, with a and b channels discarded. Re-convert the Alpha 1 channel to Grayscale (= 07) and then to RGB and tweak channel or brightness/contrast values for best visual results.
Single channel selection (use Red = 08, Green, or Blue as source for further B&W image processing, depending on your perception) to find the image you expect.
Mixing channels (Image > Adjustments > Channel Mixer = 09) may surprise you with good resulting photographs when channels are tweaked. To avoid blowing whites, make sure the histogram preview is turned on (Window > Histogram).
Filters are plug-in add-ons. There are a number of solutions available in this form, to start with you may want to check freeware filters from Cybia Fotomatic BW-Plus (= 10), PhotoWiz B/W (= 11) or virtualPhotographer (= 12).
To give a hint of what can be done with seemingly simple color > BW conversion, we will follow the LAB conversion method in detail.
Color > BW through LAB color
The following is a bit lengthy procedure, yet it gives quite a lot of flexibility in producing the image you want. Follow it and you'll see it does not take much time to obtain impressive results.
Convert the image to LAB colors (Image > Mode > Lab Color). Discard the a and b channels in the Channels palette. You should have the Alpha 1 channel left only. Convert it to grayscale (Image > Mode > Grayscale. The Alpha 1 channel has turned now into the Gray channel.
Control+Click on it to load luminosity as a selection. Invert selection (Select > Inverse) and convert the image to RGB (Image > Mode > RGB Color). Create a new Solid Color... adjustment layer in the Layers palette (at the bottom). Select gray close to 50% and confirm your choice.
Select the Multiply blending mode in the drop down menu in the Layers palette to get the basic BW image. Now you can make some final touches in Brightness/Contrast or Levels adjustment layers (these would have to be created from the Layers palette) to arrive at what suits your visual taste best. Save the PSD image for archival purposes, and flatten it to save in the format needed. (= 13)
Tinting the image
You may use this step to tint the BW image. Double click the square icon in the Color Fill 1 adjustment layer in the Layers palette and choose the color you want. Set its Opacity and Color Fill parameters with sliders in the Layers palette. (= 14)
Adding simulated 3D depth
To add more depth to the image, duplicate the Background layer in the Layers palette and run the High Pass filter (Filters > Other > High Pass... = 15), adjusting its Radius by experiment. Change the Background copy blending mode to Hard Light and adjust its Opacity as required. Try and experiment with different blending modes and Opacity / Fill values for different effects.
Pure black?
Tweaking color in RGB black and white images may result in deliberate warming up the image or cooling it down a bit. The final image may turn out to be extremely appealing to the eye. To practice it, open the final BW image and call up the color balance palette (Image > Adjustments > Color Balance...).
Moving the Yellow / Blue slider to increase Yellow in the Midtones range by 5-10 warms the image up (= 16). Try to experiment with all shadows, midtones and highlights for best results. Similarly, moving the Cyan / Red slider to increase Cyan in the Midtones range by 5-10 cools down the image a bit (= 17).
Final notes
For best results, always use 16-bit images if you can, only converting them to 8-bit depth if needed. Saving images optimized for website display may be done directly from 16-bit images without reducing their bit depth.
If you primarily work with website presentations, remember that grayscale images saved as optimized JPEGs may become illegibly blackish (= 18). The same grayscale image converted to RGB and saved for web will have a different gray spectrum (= 19).
Image post-processing may involve a number of steps with different settings used for different parameters. If repeated procedures are needed, make sure to write down what you are doing. When you come across a special effect which you particularly like, you may want to make an automated task of it (Create new action... in the Actions palette).
Enjoy this process. Taking and making photos should make you fulfilled and happy. Try to understand what you are doing and you have an extra benefit of learning the tricks of the trade. After a time, you will be able to consciously apply various tools and options.
A good approach is to ask yourself a question when looking at the final image you have created: 'Would I like to have it exhibited in the Museum of Art?' Your image speaks about your subject, but also about you. Are you proud of it? Or would you rather have another try and adjust it? Become your own judge and improve your skills. Practice makes perfect.


No comments:
Post a Comment