Saturday, October 11, 2008

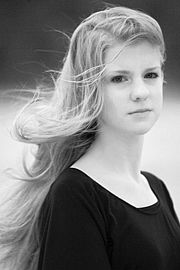
Nude Art Images in Digital Black & White

The first thing is that photography is a VISUAL art. This means there are no standards, which order you to do 'good' things (although we will use that word later on, meaning an image without clear exposure errors) and forget everything else. You are the master of the image and only your imagination and perception limit what you will produce.

Some of your images may not be acceptable to all-knowing critics, but if they meet your own personal criteria of value, that's exactly what photography is all about. Pour your individuality into your work, be creative, leave wide lanes others rush along and strand into uncharted lands.

If you can manage it, drop all photography courses and schools. Masters in any are not educated at formal institutions. Your individual taste has to be born out of your own personality, even if you lack technique.

Actually, this is no lack, but a hidden treasure. Technique can be mastered by anyone. Your vision cannot.

Whatever methods you may read about here, are thus only an indication of direction you may want to follow. When you do, explore all possibilities to find the results which are unique to you.


Introduction

The myth of post-processing

Image processing software allows deep image manipulation, including recovery of details lost in shadows and reducing overexposure. One may feel tempted to forget the basics of photography and rely on post-processing to obtain acceptable results.

This is not the best way, though, as you will lose a lot of time trying to make a good image out of faulty exposures and, more importantly, you will never learn tricks of the trade which make taking good images a snap.

By all means, try to take properly exposed images right on the spot, so that further use of programs is limited to creativity. Digital tools will help you greatly in this, histograms playing the major role. Experiment, use a variety of exposure settings and check the results. You have them immediate, so learning is easy and the only cost is your time.

There is a message in this introduction. Digital cameras take color images. Conversion to B&W may be difficult or at least time-consuming if you don't take a properly exposed, color-balanced and focused color photo first. On the other hand, when you take a well- balanced color image, you have infinite possibilities ahead for converting it or using as a point of departure for your creativity.


Color to B&W conversion methods

Having said that, we may now proceed to the practical part. The following methods are universally applied in almost all more popular software packages. For clarity reasons, we will use Photoshop commands. If you use a different program, find corresponding functions and options and re-create the procedures.

For comparison purposes, the images in the side column are processed with the described methods, with default settings used. The source was a typical 333x500px website-use full-color image (01).

There are a number of software conversion methods. Grayscale conversion (Image > Mode > Grayscale = 02) is the most straightforward. Use it for previewing images only, as in most cases the resulting grays are flat and images lack contrast and depth. The worst thing is that color channel data are lost irreversibly here, making further adjustments impossible.

Color desaturation is much better ( Image > Adjustments > Desaturate = 03). All color data are still there in the image file, and this is quite a good method to start with.

Hue-Saturation adjustment (Image > Adjustments > Hue/Saturation = 04) loses much of the original data. To make a B&W image, move the Saturation slider to 0.

Gradient application makes use of the standard software option and gives controllable results (Image > Adjustments > Gradient Map... = 05), far better than obtained with other 'simple' methods.

Lab color (Image > Mode > Lab Color = 06) conversion may produce amazing results when the Lightness channel image is taken as the source, with a and b channels discarded. Re-convert the Alpha 1 channel to Grayscale (= 07) and then to RGB and tweak channel or brightness/contrast values for best visual results.

Single channel selection (use Red = 08, Green, or Blue as source for further B&W image processing, depending on your perception) to find the image you expect.

Mixing channels (Image > Adjustments > Channel Mixer = 09) may surprise you with good resulting photographs when channels are tweaked. To avoid blowing whites, make sure the histogram preview is turned on (Window > Histogram).

Filters are plug-in add-ons. There are a number of solutions available in this form, to start with you may want to check freeware filters from Cybia Fotomatic BW-Plus (= 10), PhotoWiz B/W (= 11) or virtualPhotographer (= 12).

To give a hint of what can be done with seemingly simple color > BW conversion, we will follow the LAB conversion method in detail.


Color > BW through LAB color

The following is a bit lengthy procedure, yet it gives quite a lot of flexibility in producing the image you want. Follow it and you'll see it does not take much time to obtain impressive results.

Convert the image to LAB colors (Image > Mode > Lab Color). Discard the a and b channels in the Channels palette. You should have the Alpha 1 channel left only. Convert it to grayscale (Image > Mode > Grayscale. The Alpha 1 channel has turned now into the Gray channel.

Control+Click on it to load luminosity as a selection. Invert selection (Select > Inverse) and convert the image to RGB (Image > Mode > RGB Color). Create a new Solid Color... adjustment layer in the Layers palette (at the bottom). Select gray close to 50% and confirm your choice.

Select the Multiply blending mode in the drop down menu in the Layers palette to get the basic BW image. Now you can make some final touches in Brightness/Contrast or Levels adjustment layers (these would have to be created from the Layers palette) to arrive at what suits your visual taste best. Save the PSD image for archival purposes, and flatten it to save in the format needed. (= 13)

Tinting the image

You may use this step to tint the BW image. Double click the square icon in the Color Fill 1 adjustment layer in the Layers palette and choose the color you want. Set its Opacity and Color Fill parameters with sliders in the Layers palette. (= 14)

Adding simulated 3D depth

To add more depth to the image, duplicate the Background layer in the Layers palette and run the High Pass filter (Filters > Other > High Pass... = 15), adjusting its Radius by experiment. Change the Background copy blending mode to Hard Light and adjust its Opacity as required. Try and experiment with different blending modes and Opacity / Fill values for different effects.


Pure black?

Tweaking color in RGB black and white images may result in deliberate warming up the image or cooling it down a bit. The final image may turn out to be extremely appealing to the eye. To practice it, open the final BW image and call up the color balance palette (Image > Adjustments > Color Balance...).

Moving the Yellow / Blue slider to increase Yellow in the Midtones range by 5-10 warms the image up (= 16). Try to experiment with all shadows, midtones and highlights for best results. Similarly, moving the Cyan / Red slider to increase Cyan in the Midtones range by 5-10 cools down the image a bit (= 17).


Final notes

For best results, always use 16-bit images if you can, only converting them to 8-bit depth if needed. Saving images optimized for website display may be done directly from 16-bit images without reducing their bit depth.

If you primarily work with website presentations, remember that grayscale images saved as optimized JPEGs may become illegibly blackish (= 18). The same grayscale image converted to RGB and saved for web will have a different gray spectrum (= 19).

Image post-processing may involve a number of steps with different settings used for different parameters. If repeated procedures are needed, make sure to write down what you are doing. When you come across a special effect which you particularly like, you may want to make an automated task of it (Create new action... in the Actions palette).

Enjoy this process. Taking and making photos should make you fulfilled and happy. Try to understand what you are doing and you have an extra benefit of learning the tricks of the trade. After a time, you will be able to consciously apply various tools and options.

A good approach is to ask yourself a question when looking at the final image you have created: 'Would I like to have it exhibited in the Museum of Art?' Your image speaks about your subject, but also about you. Are you proud of it? Or would you rather have another try and adjust it? Become your own judge and improve your skills. Practice makes perfect.


Understanding Resolution - Do You Need More Pixels?

The limitation comes from the lens resolution. There's a point where more megapixels simply becomes a burden without bringing any perceivable benefit at all. I personally believe with 35mm, it is probably around 20 megapixels. Of course, there is not a clear cut off line, but a gradual approximation.

With 35mm full frame, the first critical point of megapixel arrives at 4M. I will show you why below. Before reaching that point, any increase of number of megapixel resulting a quite strict one-to-one increase of resolution. For example, 2M quite literally has twice as much much resolution as 1M. After that, this will start to degrade. For the matter of better communication, consider a coefficient called ratio between the perceivable resolution increase and the pixel number increase. This ratio is practically 1/1 before the number of pixels is 4M, but starts to fall off gradually after that. My estimate is that it would fall to less than 0.5 when the number of pixels reaches 10M, and probably less than 0.1 at 20M. I'm pretty certain that this ratio approaches 0 by 40M. What that means is that after 10M, the perceivable resolution increase one receives from every 1M increase of megapixels is less than .5M, and after 20M, the perceived resolution increase for every 1M is less than .1M. As a practical matter, after 20M, the more megapixels simply become "the Emperor's new cloth" which really is not there to be seen. It just makes some people happy. And I'm talking about full frame 35mm. For APS sensors, the number is even smaller.

All that is because the inherent limitation of the lens resolution. Take 35mm full frame. I'll use approximation to simplify the explanation. Suppose there are N columns (or rows) of photosites for every 1mm. The total number of pixels of a full frame 35mm sensor is then (Nx36)x(Nx24), which is roughly 1000N^2 (pixels). Now, good 35mm lenses usually have excellent MTF at 30 line pairs per millimeter. Especially at the center of the frame, a good 35mm lens can have 80% or above MTF at 30 line pairs per millimeter. So it is reasonable to take 30 line pairs per millimeter as a baseline. A sensor that matches this resolution would have N=2x30 (two photosites for each line pair), and correspondingly the total number of pixels of 1000xN^2 = 1000x60^2, which is approximately 4M (or slightly less). This tells you two sides of the story. First, on a 35mm full frame sensor, before the number of pixels reaches 4M, most lenses have enough resolving power to take full advantage of the more pixels. Second, when the number of pixels goes beyond 4M, most lenses will not be able to fully take advantage of the increase of the pixels.

That of course doesn't mean that after 4M, the increase of the pixel numbers will have no benefit at all. They still do, but will not have the full benefit due to the lens resolution limitation.

For example, suppose you have a lens that has an MTF value of 50% (or MTF50) at 50 line pairs/mm (meaning that at this resolution, the lens delivers a perceivable contrast of only 50% of the full contrast, i.e., losing 50% of contrast). A sensor that matches this resolution would have N=2x50=100, and correspondingly a total number of pixels of 1000xN^2 = 1000x100^2 = 10M. That means, with this lens, a 10M sensor is able to represent each line pair with two columns/rows of photosites, but with a loss of 50% of contrast at such resolution. It could be said that at this level, you are only getting 50% of the perceivable resolution out of the increased number of pixels.

Now, those who are familiar with lens tests will tell you that a 35mm lens with an MFT50 at 50 line pairs/mm is a very good lens. For 35mm full frame, this is about 1200 lp/picture height.

With a 20M sensor, you need a lens that has an MTF50 with 70 lp/mm or an equivalent of 1700 lp/picture height for full frame. This is already surpassing the optimal resolution (center of the frame with a stopped down aperture) of even the best prime lenses. And we are talking about MTF with a 50% loss of contrast here.

Overall, even with a full frame, going from 10M to 20M has less than 50% increase in perceivable resolved pixels even with the best lenses. You're certainly not doubling the resolved pixels there. Of course, even an increase of 50% can be important for some people who (1) actually need a greater resolution; and (2) actually have possession to the top lenses and use them. On the other hand, with the same technology, going from 10M to 20M will lose at least one full stop of the ISO performance. I have no problem with people's preferences. I just have a problem with people making choices without the necessary information and understanding.

Still, one could make a rational (albeit discounted) argument for 20M for a full frame sensor. But beyond that, it certainly looks like an Emperor's new clothes to me, unless they suddenly come up with drastically better optics, which is extremely unlikely.

Besides, unless you want to make prints larger than 30 inches, you really don't benefit from more than 20M anyway even if you had a lens that could resolve more. And you're not getting those large files as a freebie. They impose a heavy tax on your computer system.

Right ISO for Your Picture

Have you even considered changing the ISO sensitivity on your camera? If you don't know what ISO sensitivity refers to, you may want to consult your camera manual for a base point understanding about that and how it works. In short, changing the ISO setting on your camera changes the sensitivity to light, the lower number that you select the less sensitive to light (and conversely the higher the number the more sensitive it becomes).
Why change ISO?

You may wonder why it is necessary to make change of the ISO sensitivity; in fact, your camera just picked a suitable ISO sensitivity probably the best for your pictures when you are shooting in automatic mode. When you discover the limitation of the automatic mode, you will start to care about what ISO sensitivity should be used when shooting in other modes.

This is useful when you are shooting in different lighting situations - particularly when there is low light and you might not be able to use a flash (you'd bump up your ISO setting in this case), and this is just the beginning why you would want to shoot at higher ISO.


The Inside Story

The only cost of increasing ISO is that as you do it you'll notice that the "noise" or "grain" in your shots also begins to increase. Thus, the rule is simple - choose the lowest ISO possible for smooth and grain-free shots. The latest generation DSLR cameras today has very nice result at ISO 400 and lower sensitivity, you may consider the output are "noise-free" setup. You have start to concern about anything above ISO 400.

We have latest generation cameras today claim their capability for good higher ISO performance, is this just a matter of marketing game? or something to do? The higher ISO capability definitely gives an overall improvement on photography options. Firstly, at the same exposure amount, a smaller aperture can be used, this ensures subjects are in the DOF coverage for sharpness, it also means a higher shutter speed is possible to freeze actions. Most lenses go to their sweet aperture after stopped down 1-2 stops, the higher ISO sensitivity also makes the optimal setup easier. On the other hand, you may use lower speed lens, and thus less investment - Canon, Nikon and all other lenses manufacturers would probably disagree on that .... :P.

Advanced cameras may have state-of-the-art noise reduction program running in camera to reduce noise at higher ISO. And if you shoot RAW format, RAW processor tools may further optimize your image for smooth output. Lastly, there are third-party noise reduction tools in the market; they are effective enough to further tune up your higher ISO images and make them really usable.


Make Sure Yourself

First of first, make sure you know your camera well. If you don't have any idea what you would probably have at higher ISO settings from your camera, I will recommend you run through a series of test shots at various higher ISO setup under environments mostly you would work with. I trial run my Canon 5D, 40D and 400D and assess their higher ISO performance. I understand pretty well what I could expect from these cameras when shooting at various higher ISO configuration. See articles:


Canon EOS 5D - Dark Angel in Digital Photography
Canon EOS 40D for Serious & Everyday Work
Canon EOS 400D Combo for Everyday Snaps


Then, make sure you change ISO that you will need to get in the habit of checking what setting is selected at the start of every photo shoot. Many photographers have been disappointed at the end of a shoot to find that they forgot to check what ISO setting they left their camera on in their last shoot. There is nothing worse than thinking you are shooting at an ISO of 100 only to find you forgot to switch it back from 1600. To help with this always check your ISO setting before starting to shoot - but also try to always switch it back after a shoot.

Now, make sure you got a properly exposure picture! This is the most critical part and it directly impacts the final result even with the right ISO set. A badly exposure picture can just make everything going into a mess, and become unusable even after post-processing noise reduction. How could I make a properly exposure picture? Huh?! .... good question, but this should return to the basic, the best answer is to be given by yourself - learn more about your camera and shoot more!

Monday, September 8, 2008


Monday, August 18, 2008

Photography and the Great Outdoors

Combining photography with the passion of hiking, biking and mountain climbing can result in the most incredible photographs imaginable. Whether it's ice climbing in the Rockies, with your camera bag packed safely away, until you reach the summit where you have a breathtaking panoramic view of the frozen earth spread out as far as the eye can see. Or a leisurely springtime hike up a flower carpeted Pocono hillside with your camera close at hand to catch that pheasant or covey of quail. The outdoors and photography are a perfect match.

If you're a week-end photographer who can't wait to get out of the city and become one with nature, there are countless opportunities that will allow you to fulfill your desire to "get away" and get that "shot of a lifetime".

Consider those who are lucky enough to live in Seattle, Washington where you can leave work on a Friday afternoon and be standing on the majestic and rugged coastline, removing your camera and tripod from their bag in time to be setting up to focus on one of the most beautiful sunsets on earth. The next morning, while enjoying your first cup of coffee, you could be snapping pictures of the Grey whales which migrate north along the Washington coast between February and April every year.

Or maybe mountain scenery is your first love and you are fortunate enough to live in the Yellowstone area of Montana were the wildlife is phenomenal. Grizzly, coyote, elk.... big horned sheep playing on the mountainside. Buffalo grazing peacefully, as they must have a 100 years ago. This is truly Big Sky Country where you can catch a glimpse of a graceful eagle gliding silently through the trees. These are pictures most people can only see in a magazine, not through their camera lens on a brisk autumn morning.

Remember it's important to research not only where you're going to be photographing and what camera equipment you'll be using, but also the bags, backpacks and pouches to which you entrust your valuable cameras, lenses, tripods and accessories The touring bicyclist needs to invest in a dry sack in the event he encounters inclement weather, but the young photographer hiking through the Sierra Nevada, in search of the various species of blooming cactus, probably would be in need of the backpack with room for her water bottles. Look for quality, durability and functionality.

Whatever your passion, wherever you call home. There are beautiful pictures waiting to be taken. That horse pasture you are fortunate enough to pass on your way to work every day. Stop; take a good look. I bet you'll see a terrific photograph. One you'd probably be in awe of if you saw it in a magazine. So pack up those camera bags and keep your equipment handy. You never know when that one perfect picture will appear.

Photography Pioneers

Modern day photography dates back to the early 1800's. The word photography is derived from the Greeks; photos meaning light and graphein meaning to draw. The word was first used in 1839 by scientist Sir John FW Herschel to describe a method of recording images. That was 12 years after the first photograph was captured by Frenchman Louis Jacque Mande Daguerre, a professional opera scene painter. This first process took eight hours and he then worked 12 more years to reduce the expose time to under 30 minutes and keep the image from disappearing. These first photographs were exposed on metal that had been sensitized to accept the image and were called Daguerreotypes after their French inventor. Then came the tintype, invented in 1856 by Hamilton Smith. This was a thin sheet of iron used as a base for light sensitive material to produce a photograph.

Along came an American from upstate New York, George Eastman, who was very fascinated by photography, but frustrated with what he considered cumbersome exposure methods. He developed a dry photographic plate, patented it in the United States and England and began his first photographic business in 1880. In 1884, he replaced the glass plates with paper rolls allowing multiple images to be taken much more quickly. Four years later, on September 4, 1888 he patented he "roll film camera". You could take your pictures, mail the camera to Kodak who would develop your 100 photos and send them back to you along with another roll of 100 exposures. Sound familiar? The big difference? You used to get your camera back, now you don't!

These pioneers would be amazed with the equipment available to us today. We have the digital camera, the SLR,35mm, the camcorder, automatic exposure and automatic focusing, zoom lens and video. We even take pictures with our cellphones, which we can then download onto our computers. We have the luxury of going just about anywhere to get that perfect shot. Indoors, outdoors, underwater, or on top of a mountain. We attach our camera to a tripod and set the self timer so we can be in that majestic mountain scene.

When the equipment was of a size to be transported from place to place, they certainly didn't have a camera case with a padded shoulder strap. We have a camera bag suited to fit every camera and the accessories. Backpacks for hiking up that trail and lens pouches.

We can take pictures as a hobby, while on vacation; supplement our income as a weekend photographer/writer for a local newspaper; or travel the world as a full-time photojournalist. Today, our photographic possibilities are limitless thanks, at least in part, to these photography trailblazers.

Sunday, August 17, 2008

Black-and-white infrared film

Black-and-white infrared negative films are sensitive to wavelengths in the 700 to 900 nm near infrared spectrum, and most also have a sensitivity to blue light wavelengths. The notable halation effect or glow often seen in the highlights of infrared photographs is an artifact of Kodak High Speed Infrared (HIE) black-and-white negative film and not an artifact of infrared light. The glow or blooming is caused by the absence of an anti-halation layer on the back side of Kodak HIE film, this results in a scattering or blooming around the highlights that would usually be absorbed by the anti-halation layer in conventional films.

Frank Lloyd Wright's Rudin House: panchromatic film on the left, infrared on the right

The majority of black-and-white infrared art, landscape, and wedding photography is done using orange (15 or 21), red (23, 25, or 29) or visually opaque (72) filters over the lens to block the blue visible light from the exposure. The intent of filters in black-and-white infrared photography is to block blue wavelengths and allow infrared to pass through. Without filters, infrared negative films look much like conventional negative films because the blue sensitivity lowers the contrast and effectively counteracts the infrared look of the film. Some photographers use orange or red filters to allow slight amounts of blue wavelengths to reach the film, and thus lower the contrast. Very dark-red (29) filters block out almost all blue, and visually opaque (70, 89b, 87c, 72) filters block out all blue and also visible-red wavelengths, resulting in a more pure-infrared photo that usually looks more contrasty.

Certain infrared-sensitive films like Kodak HIE must only be loaded and unloaded in total darkness. Infrared black-and-white films require special development times but development is usually achieved with standard black-and-white film developers and chemicals (like D-76). Kodak HIE film has a polyester film base that is very stable but extremely easy to scratch, therefore special care must be used in the handling of Kodak HIE throughout the development and printing/scanning process to avoid damage to the film.

As of November 2, 2007, "KODAK is preannouncing the discontinuance" of HIE Infrared 35mm film stating the reasons that, "Demand for these products has been declining significantly in recent years, and it is no longer practical to continue to manufacture given the low volume, the age of the product formulations and the complexity of the processes involved." see notice: http://www.kodak.com/global/en/professional/products/films/discontinuedNotice.jhtml?id=0.2.26.14.25&lc=en At the time of this notice, HIE Infrared 135-36 was available at a street price of around $12.00 a roll at US mail order outlets.

Arguably the greatest obstacle to infrared film photography has been the increasing difficulty of obtaining infrared-sensitive film. However despite the discontinuance of HIE, other newer infrared sensitive emulsions from EFKE, ROLLEI, and ILFORD are still available, but these formulations have differing sensitivity and specifications from the venerable KODAK HIE that has been around for at least two decades. Some of these infrared films are available in 120 and larger formats as well as 35mm, which adds flexibility to their application. With the discontinuance of Kodak HIE, Efke's IR820 film has become the only IR film on the market with good sensitivity beyond 750nm, the Rollei film does extend beyind 750nm but IR sensitivity falls of very rapidly.

Film cameras

Many conventional cameras can be used for infrared photography, where infrared is taken to mean light of a wavelength only slightly longer than that of visible light. Photography of rather longer wavelengths is normally termed thermography and requires special equipment.

With some patience and ingenuity, most film cameras can be used. However, some cameras of the 1990s that used 35mm film have infrared sprocket-hole sensors that can fog infrared film (their manuals may warn against the use of infrared film for this reason). Other film cameras are not completely opaque to infrared light.

Focusing infrared

Most manual focus 35mm SLR and medium format SLR lenses have a red dot, line or diamond, often with a red "R" called the infrared index mark, that can be used to achieve proper infrared focus; many autofocus lenses no longer have this mark. When a single-lens reflex (SLR) camera is fitted with a filter that is opaque to visible light, the reflex system becomes useless for both framing and focusing, and a tripod is necessary for composition without the filter before the exposure is done with the filter attached. A sharp infrared photograph can be done with a tripod, a narrow aperture (like f/22) and a slow shutter speed without focus compensation, however wider apertures like f/2.0 can produce sharp photos only if the lens is meticulously refocused to the infrared index mark, and only if this index mark is the correct one for the filter and film in use.

Most apochromatic ('APO') lenses do not have an Infrared index mark and do not need to be refocused for the infrared spectrum because they are already optically corrected into the near-infrared spectrum. Catadioptric lenses do not require this adjustment because mirrors do not suffer from chromatic aberration.

Zoom lenses may scatter more light through their more complicated optical systems than prime lenses, that is, lenses of fixed focal length; for example, an infrared photo taken with a 50mm prime lens may look more contrasty than the same image taken at 50mm with a 28–80 zoom.

Some lens manufacturers such as Leica never put IR index marks on their lenses. The reason for this is because any index mark is only valid for one particular IR filter and film combination, and may lead to user error. Even when using lenses with index marks, focus testing is advisable as there may be a large difference between the index mark and the subject plane.

Creative Ways to display Your Photos

You have a terrific digital camera that you use to take awesome pictures. A great quality camera case that holds that camera, plus all the accessories you need on your photo shoots. You have the memory cards and the equipment to transfer the images to your computer once you get home with your treasured photographs. And you have boxes and boxes of those wonderful photographs that, occasionally, you sit down and look through and then put back in the closet.

Wouldn't it be great to be able to enjoy some of those beautiful shots of that skiing trip you took to Colorado every day? Or those great shots of the kids at the beach last summer? And, how about those wonderful tintypes of your ancestors who came into this country through Ellis Island years ago. Wouldn't it be special to see them proudly displayed, rather than stuck away, forgotten, except for those rare occasions when you drag them out to show the kids? There are so many ways to display photographs today, the possibilities are almost endless.

The traditional way to display photographs is to frame them, or put them in a frame, and either hang them on a wall or place them on some surface. The best way to see how a group of pictures is going to look on a wall is to lay them out on the floor. Move them around, work with them. After you get the placement that is right, then start putting them up on the wall. Remember the general rule for hanging any art, hang it at eye level. And, as with most things, odd numbers are more eye appealing than even.

If you have a staircase, it's the perfect area to display your photographs. It removes the need to hang the pictures in a perfectly straight line, and the effect of the photos traveling up, following the stairs, can make a dramatic statement. It can be made into a theme wall, such as a wedding wall, hanging wedding pictures dating back as far in your family as you can find them. Pictures can be set on anything, a fireplace mantel, piano, dressers, coffee tables and end tables, the television, basically, anything that has a flat top surface can have a picture placed on it. But, you want to place them with purpose. Group a few like pictures together and combine them with a couple quality accessories to make a beautiful table arrangement.

When hanging your photos, there are many options, the most traditional is the picture hanger and wire on the back of the picture. But, there are some other, more creative ways to hang pictures. Using ribbon, for example. There are many techniques for hanging photos with ribbon. You can take two lengths of ribbon and attach them to the back of the picture frame at the top corners. Then bring them together, tie them in a bow, and hang the picture on the wall. A couple pictures hung like this along with a few complimentary pieces, makes a lovely grouping.

Armed with these creative ideas for displaying those photographs you're going to be taking, you'll want to be sure to keep your camera and camera bag close by. Because once you have your photographs arranged, you can cycle the photos with new photographs in some of the frames.

Creative Ways to Display Those Special Photos

Framing and hanging your prized photographs is always an effective way to display and enjoy them. There are many ways to place them on the wall for variety and to fit the space you're trying to fill. But there're also so many other ways to present those treasured photos that will add an array of variety to your decor.

Take a mirror, for example. You can turn a mirror into an incredible picture frame. First, find a framed mirror that will compliment the style of your furnishings. If you're unable to find one that you like already framed, buy the frame you want and have a piece if mirror cut to fit. Select the picture you want to "frame" in the mirror. Based on the personality of the picture, decide what shape you want around the picture. Lightly draw the shape on the back of the mirror. Then, using a razor blade, carefully remove the silver backing. Take care to make the opening smaller than the picture you're using or use a matte behind the picture for a finished appearance. Tape the picture and the matte to the back of the mirror. When finished, you'll have a very unique and beautiful piece of art.

Shadow boxes aren't just for things. They're a perfect vessel for your prized photos. Shadow boxes are intended to be theme-oriented. Whether you're a professional photographer or an avid amateur photographic enthusiast, you'll take pleasure in a well-done shadow box. Gather together some of your most special pictures and photography items, such as a camera, camera case, and film. Arrange them in the shadow box and display them predominantly for all to enjoy.

A serving tray is another unconventional means of displaying your treasured images. These are particularly nice for photographers who take pictures of such things as flowers and botanicals. The trays can be purchased finished or unfinished at craft stores. They can also cut a piece of glass for you to fit inside the tray. Finish the tray, if needed, then place your photographs on the tray and cover with the glass. If you don't glue the pictures down, you can change them periodically, changing the appearance of the tray. Take your camera bag, your camera and other accessories and spend some time getting those great floral shots to keep changing your tray's pictures.

Wearable art is very popular. You can make your own by scanning your picture onto fabric sheets using your computer and an ink jet printer. Once you get the picture copied onto the fabric, you can place it on a number of items...shirts, hats, totes, jackets. Bedding is a wonderful and interesting medium for picture transfers. Select some of the best pictures of a couple's wedding and transfer the images onto a set of lovely sheets and pillowcases. Or, consider making them a wedding quilt with those same photographs. Either one would make a most memorable gift for the newlyweds.

Put your camera and accessories in your camera case and start shooting. The more pictures you take, the more likely you are to find those pictures worthy of being placed on that set of sheets or the serving tray. Take all the pictures you can and display them uniquely, with flair. Use your imagination and have fun.

Infrared photography

In infrared photography, the film or image sensor used is sensitive to infrared light. The part of the spectrum used is referred to as near-infrared to distinguish it from far-infrared, which is the domain of thermal imaging. Wavelengths used for photography range from about 700 nm to about 900 nm. Usually an "infrared filter" is used; this lets infrared (IR) light pass through to the camera, but blocks all or most of the visible light spectrum (the filter thus looks black or deep red).

When these filters are used together with infrared-sensitive film or sensors, very interesting "in-camera effects" can be obtained; false-color or black-and-white images with a dreamlike or sometimes lurid appearance known as the "Wood Effect."

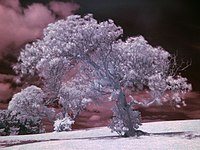
The effect is mainly caused by foliage (such as tree leaves and grass) strongly reflecting in the same way visible light is reflected from snow. There is a small contribution from chlorophyll fluorescence, but this is extremely small and is not the real cause of the brightness seen in infrared photographs.

The other attributes of infrared photographs include very dark skies and penetration of atmospheric haze, caused by reduced Rayleigh scattering and Mie scattering, respectively, compared to visible light. The dark skies, in turn, result in less infrared light in shadows and dark reflections of those skies from water, and clouds will stand out strongly. These wavelengths also penetrate a few millimeters into skin and give a milky look to portraits, although eyes often look black.

Top: tree photographed in the near infrared range. Bottom: same tree in the visible part of the spectrum.

Infrared image of the Mississippi River crossed by a bridge and a dam, between red foliage on left, and blue parking lots and buildings on right

Technical photography

The camera has a long and distinguished history as a means of recording phenomena from the first use by Daguerre and Fox-Talbot, such as astronomical events (eclipses for example) and small creatures when the camera was attached to the eyepiece of microscopes (in photomicroscopy). The camera also proved useful in recording crime scenes and the scenes of accidents, one of the first uses being at the scene of the Tay Rail Bridge disaster of 1879. The set of accident photographs was used in the subsequent court of inquiry so that witnesses could identify pieces of the wreckage, and the technique is now commonplace in courts of law. The set of over 50 Tay bridge photographs are of very high quality and when scanned at high resolution, can be enlarged to show details of the failed components such as broken cast iron lugs and the tie bars which failed to hold the towers in place. They show that the bridge was badly designed, badly built and badly maintained.

Between 1846 and 1852 Charles Brooke invented a technology for the automatic registration of instruments by photography. These instruments included barometers, thermometers, psychrometers, and magnetometers, which recorded their readings by means of an automated photographic process.

Other photographic image forming techniques

Besides the camera, other methods of forming images with light are available. For instance, a photocopy or xerography machine forms permanent images but uses the transfer of static electrical charges rather than photographic film, hence the term electrophotography. Photograms are images produced by the shadows of objects cast on the photographic paper, without the use of a camera. Objects can also be placed directly on the glass of an image scanner to produce digital pictures.

Photography styles

Commercial photography

Manual shutter control and exposure settings can achieve unusual results

Commercial photography is probably best defined as any photography to which money exchanges hands. In this light money could be paid for the subject of the photograph or the photograph itself. Wholesale, retail, and professional uses of photography would fall under this definition. The commercial photographic world could include:

  • Advertising photography: photographs made to illustrate and usually sell a service or product. These images are generally done with an advertising agency, design firm or with an in-house corporate design team.
  • Fashion and glamour photography: This type of photography usually incorporates models. Fashion photography emphasizes the clothes or product, glamour emphasizes the model. Glamour photography is popular in advertising and in men's magazines. Models in glamour photography may be nude, but this is not always the case.
  • Crime Scene Photography: This type of photography consists of photographing scenes of crime such as robberies and murders. A black and white camera or an infrared camera may be used to capture specific details.
  • Still life photography usually depicts inanimate subject matter, typically commonplace objects which may be either natural or man-made.
  • Food photography can be used for editorial, packaging or advertising use. Food photography is similar to still life photography, but requires some special skills.
  • Editorial photography: photographs made to illustrate a story or idea within the context of a magazine. These are usually assigned by the magazine.
  • Photojournalism: this can be considered a subset of editorial photography. Photographs made in this context are accepted as a documentation of a news story.
  • Portrait and wedding photography: photographs made and sold directly to the end user of the images.
  • Fine art photography: photographs made to fulfill a vision, and reproduced to be sold directly to the customer.
  • Landscape photography: photographs of different locations made to be sold to tourists as postcards
  • Conceptual photography: Photography that turns a concept or idea into a photograph. Even though what is depicted in the photographs are real objects, the subject is strictly abstract.
  • Wildlife photography that demonstrates life of the animals.
  • Pornography: explicit depiction of sexual subject matter, especially with the sole intention of sexually exciting the viewer using a variety of media including photography. See History of erotic photography.
  • Photo sharing: publishing or transfer of a user's digital photos online.

The market for photographic services demonstrates the aphorism "one picture is worth a thousand words," which has an interesting basis in the history of photography. Magazines and newspapers, companies putting up Web sites, advertising agencies and other groups pay for photography.

Many people take photographs for self-fulfillment or for commercial purposes. Organizations with a budget and a need for photography have several options: they can employ a photographer directly, organize a public competition, or obtain rights to stock photographs. Photo stock can be procured through traditional stock giants, such as Getty Images or Corbis; smaller microstock agencies, such as Fotolia; or web marketplaces, such as Cutcaster.

Photography as an art form


During the twentieth century, both fine art photography and documentary photography became accepted by the English-speaking art world and the gallery system. In the United States, a handful of photographers, including Alfred Stieglitz, Edward Steichen, John Szarkowski, and Edward Weston, spent their lives advocating for photography as a fine art. At first, fine art photographers tried to imitate painting styles. This movement is called Pictorialism, often using soft focus for a dreamy, 'romantic' look. In reaction to that, Weston, Ansel Adams, and others formed the f/64 Group to advocate 'straight photography', the photograph as a (sharply focused) thing in itself and not an imitation of something else.

The aesthetics of photography is a matter that continues to be discussed regularly, especially in artistic circles. Many artists argued that photography was the mechanical reproduction of an image. If photography is authentically art, then photography in the context of art would need redefinition, such as determining what component of a photograph makes it beautiful to the viewer. The controversy began with the earliest images "written with light"; Nicéphore Niépce, Louis Daguerre, and others among the very earliest photographers were met with acclaim, but some questioned if their work met the definitions and purposes of art.

Clive Bell in his classic essay Art states that only "significant form" can distinguish art from what is not art.

There must be some one quality without which a work of art cannot exist; possessing which, in the least degree, no work is altogether worthless. What is this quality? What quality is shared by all objects that provoke our aesthetic emotions? What quality is common to Sta. Sophia and the windows at Chartres, Mexican sculpture, a Persian bowl, Chinese carpets, Giotto's frescoes at Padua, and the masterpieces of Poussin, Piero della Francesca, and Cezanne? Only one answer seems possible - significant form. In each, lines and colors combined in a particular way, certain forms and relations of forms, stir our aesthetic emotions.

On February 14th 2006 Sotheby’s London sold the 2001 photograph "99 Cent II Diptychon" for an unprecedented $3,346,456 to an anonymous bidder making it the most expensive of all time.

Photography types

Black-and-white photography

All photography was originally monochrome, most of these photographs were black-and-white. Even after color film was readily available, black-and-white photography continued to dominate for decades, due to its lower cost and its "classic" photographic look. It is important to note that some monochromatic pictures are not always pure blacks and whites, but also contain other hues depending on the process. The Cyanotype process produces an image of blue and white for example. The albumen process which was used more then 150 years ago had brown tones.

Many photographers continue to produce some monochrome images. Some full color digital images are processed using a variety of techniques to create black and whites, and some cameras have even been produced to exclusively shoot monochrome.

(wratten #25) to enhance or diminish the rendering of certain light wavelengths.

Color photography

Color photography was explored beginning in the mid 1800s. Early experiments in color could not fix the photograph and prevent the color from fading. The first permanent color photo was taken in 1861 by the physicist James Clerk Maxwell.

Early color photograph taken by Prokudin-Gorskii (1915)

One of the early methods of taking color photos was to use three cameras. Each camera would have a color filter in front of the lens. This technique provides the photographer with the three basic channels required to recreate a color image in a darkroom or processing plant. Russian photographer Sergei Mikhailovich Prokudin-Gorskii developed another technique, with three color plates taken in quick succession.

Practical application of the technique was held back by the very limited color response of early film; however, in the early 1900s, following the work of photo-chemists such as H. W. Vogel, emulsions with adequate sensitivity to green and red light at last became available.

The first color plate, Autochrome, invented by the French Lumière brothers, reached the market in 1907. It was based on a 'screen-plate' filter made of dyed dots of potato starch, and was the only color film on the market until German Agfa introduced the similar Agfacolor in 1932. In 1935, American Kodak introduced the first modern ('integrated tri-pack') color film, Kodachrome, based on three colored emulsions. This was followed in 1936 by Agfa's Agfacolor Neue. Unlike the Kodachrome tri-pack process, the color couplers in Agfacolor Neue were integral with the emulsion layers, which greatly simplified the film processing. Most modern color films, except Kodachrome, are based on the Agfacolor Neue technology. Instant color film was introduced by Polaroid in 1963.

Color photography may form images as a positive transparency, intended for use in a slide projector or as color negatives, intended for use in creating positive color enlargements on specially coated paper. The latter is now the most common form of film (non-digital) color photography owing to the introduction of automated photoprinting equipment.

Full-spectrum, ultraviolet and infrared photography


Ultraviolet and infrared films have been available for many decades and employed in a variety of photographic avenues since the 1960s. New technological trends in digital photography have opened a new direction in full spectrum photography, where careful filtering choices across the ultraviolet, visible and infrared lead to new artistic visions.

Modified digital cameras can detect some ultraviolet, all of the visible and much of the near infrared spectrum, as most digital imaging sensors are sensitive from about 350nm to 1000nm. An off-the-shelf digital camera contains an infrared hot mirror filter that blocks most of the infrared and a bit of the ultraviolet that would otherwise be detected by the sensor, narrowing the accepted range from about 400nm to 700nm[3]. Replacing a hot mirror or infrared blocking filter with an infrared pass or a wide spectrally transmitting filter allows the camera to detect the wider spectrum light at greater sensitivity. Without the hot-mirror, the red, green and blue (or cyan, yellow and magenta) colored micro-filters placed over the sensor elements pass varying amounts of ultraviolet (blue window) and infrared (primarily red, and somewhat lesser the green and blue micro-filters).

Uses of full spectrum photography are for fine art photography, geology, forensics & law enforcement, and even some claimed use in ghost hunting.

Digital photography

Traditional photography burdened photographers working at remote locations without easy access to processing facilities, and competition from television pressured photographers to deliver images to newspapers with greater speed. Photo journalists at remote locations often carried miniature photo labs and a means of transmitting images through telephone lines. In 1981, Sony unveiled the first consumer camera to use a charge-coupled device for imaging, eliminating the need for film: the Sony Mavica. While the Mavica saved images to disk, the images were displayed on television, and the camera was not fully digital. In 1990, Kodak unveiled the DCS 100, the first commercially available digital camera. Although its high cost precluded uses other than photojournalism and professional photography, commercial digital photography was born.

Digital imaging uses an electronic image sensor to record the image as a set of electronic data rather than as chemical changes on film. The primary difference between digital and chemical photography is that chemical photography resists manipulation because it involves film and photographic paper, while digital imaging is a highly manipulative medium. This difference allows for a degree of image post-processing that is comparatively difficult in film-based photography and permits different communicative potentials and applications.

Digital point-and-shoot cameras have become widespread consumer products, outselling film cameras, and including new features such as video and audio recording. Kodak announced in January 2004 that it would no longer sell reloadable 35 mm cameras in western Europe, Canada and the United States after the end of that year. Kodak was at that time a minor player in the reloadable film cameras market. In January 2006, Nikon followed suit and announced that they will stop the production of all but two models of their film cameras: the low-end Nikon FM10, and the high-end Nikon F6. On May 25, 2006, Canon announced they will stop developing new film SLR cameras.[4]

According to a survey made by Kodak in 2007, 75 percent of professional photographers say they will continue to use film, even though some embrace digital.[5]

According to the U.S. survey results, more than two-thirds (68 percent) of professional photographers prefer the results of film to those of digital for certain applications including:

  • film’s superiority in capturing more information on medium and large format films (48 percent);
  • creating a traditional photographic look (48 percent);
  • capturing shadow and highlighting details (45 percent);
  • the wide exposure latitude of film (42 percent); and
  • archival storage (38 percent)

Because photography is popularly synonymous with truth ("The camera doesn't lie."), digital imaging has raised many ethical concerns. Many photojournalists have declared they will not crop their pictures, or are forbidden from combining elements of multiple photos to make "illustrations," passing them as real photographs. Many courts will not accept digital images as evidence because of their inherently manipulative nature. Today's technology has made picture editing relatively simple for even the novice photographer.

Recent changes of in-camera processing allows digital fingerprinting of RAW photos to verify against tampering of digital photos for forensics use.


History of photography

Photography is the result of combining several technical discoveries. Long before the first photographs were made, Ibn al-Haytham (Alhazen) (965–1040) invented the camera obscura and pinhole camera,[2] Albertus Magnus (1193–1280) discovered silver nitrate, and Georges Fabricius (1516–1571) discovered silver chloride. Daniel Barbaro described a diaphragm in 1568. Wilhelm Homberg described how light darkened some chemicals (photochemical effect) in 1694. The fiction book Giphantie, by French author Tiphaigne de la Roche, described what can be interpreted as photography.

Photography as a usable process goes back to the 1820s with the development of chemical photography. The first permanent photograph was an image produced in 1826 by the French inventor Nicéphore Niépce. However, the picture took eight hours to expose, so he went about trying to find a new process. Working in conjunction with Louis Daguerre, they experimented with silver compounds based on a Johann Heinrich Schultz discovery in 1724 that a silver and chalk mixture darkens when exposed to light. Niépce died in 1833, but Daguerre continued the work, eventually culminating with the development of the daguerreotype in 1837. Eventually, France agreed to pay Daguerre a pension for his formula, in exchange for his promise to announce his discovery to the world as the gift of France, which he did in 1839.

Meanwhile, Hercules Florence had already created a very similar process in 1832, naming it Photographie, and William Fox Talbot had earlier discovered another means to fix a silver process image but had kept it secret. After reading about Daguerre's invention, Talbot refined his process so that it might be fast enough to take photographs of people. By 1840, Talbot had invented the calotype process, which creates negative images. John Herschel made many contributions to the new methods. He invented the cyanotype process, now familiar as the "blueprint". He was the first to use the terms "photography", "negative" and "positive". He discovered sodium thiosulphate solution to be a solvent of silver halides in 1819, and informed Talbot and Daguerre of his discovery in 1839 that it could be used to "fix" pictures and make them permanent. He made the first glass negative in late 1839.

In March of 1851, Frederick Scott Archer published his findings in "The Chemist" on the wet plate collodion process. This became the most widely used process between 1852 and the late 1880s when the dry plate was introduced. There are three subsets to the Collodion process; the Ambrotype (positive image on glass), the Ferrotype or Tintype (positive image on metal) and the negative which was printed on Albumen or Salt paper.

Many advances in photographic glass plates and printing were made in through the nineteenth century. In 1884, George Eastman developed the technology of film to replace photographic plates, leading to the technology used by film cameras today.

In 1908 Gabriel Lippmann won the Nobel Laureate in Physics for his method of reproducing colours photographically based on the phenomenon of interference, also known as the Lippmann plate.

Uses of photography

Photography gained the interest of many scientists and artists from its inception. Scientists have used photography to record and study movements, such as Eadweard Muybridge's study of human and animal locomotion in 1887. Artists are equally interested by these aspects but also try to explore avenues other than the photo-mechanical representation of reality, such as the pictorialist movement. Military, police, and security forces use photography for surveillance, recognition and data storage. Photography is used to preserve memories of favorite times, to capture special moments, to tell stories, to send messages, and as a source of entertainment.

Commercial advertising relies heavily on photography and has contributed greatly to its development.

Controlling the photographic exposure and rendering

Camera controls are inter-related. The total amount of light reaching the film plane (the "exposure") changes with the duration of exposure, aperture of the lens, and, the effective focal length of the lens (which in variable focal length lenses, can change as the lens is zoomed). Changing any of these controls can alter the exposure. Many cameras may be set to adjust most or all of these controls automatically. This automatic functionality is useful for occasional photographers in many situations.

The duration of an exposure is referred to as shutter speed, often even in cameras that don't have a physical shutter, and is typically measured in fractions of a second. Aperture is expressed by an f-number or f-stop (derived from focal ratio), which is proportional to the ratio of the focal length to the diameter of the aperture. If the f-number is decreased by a factor of \sqrt 2, the aperture diameter is increased by the same factor, and its area is increased by a factor of 2. The f-stops that might be found on a typical lens include 2.8, 4, 5.6, 8, 11, 16, 22, 32, where going up "one stop" (using lower f-stop numbers) doubles the amount of light reaching the film, and stopping down one stop halves the amount of light.

Exposures can be achieved through various combinations of shutter speed and aperture. For example, f/8 at 8 ms (=1/125th of a second) and f/5.6 at 4 ms (=1/250th of a second) yield the same amount of light. The chosen combination has an impact on the final result. In addition to the subject or camera movement that might vary depending on the shutter speed, the aperture (and focal length of the lens) determine the depth of field, which refers to the range of distances from the lens that will be in focus. For example, using a long lens and a large aperture (f/2.8, for example), a subject's eyes might be in sharp focus, but not the tip of the nose. With a smaller aperture (f/22), or a shorter lens, both the subject's eyes and nose can be in focus. With very small apertures, such as pinholes, a wide range of distance can be brought into focus.

Image capture is only part of the image forming process. Regardless of material, some process must be employed to render the latent image captured by the camera into the final photographic work. This process consists of two steps, development, and printing.

During the printing process, modifications can be made to the print by several controls. Many of these controls are similar to controls during image capture, while some are exclusive to the printing process. Most controls have equivalent digital concepts, but some create different effects. For example, dodging and burning controls are different between digital and film processes. Other printing modifications include:

  • Chemicals and process used during film development
  • Duration of exposure – equivalent to shutter speed
  • Printing aperture – equivalent to aperture, but has no effect on depth of field
  • Contrast
  • Dodging – reduces exposure of certain print areas, resulting in lighter areas
  • Burning – increases exposure of certain areas, resulting in darker areas
  • Paper textureglossy, matte, etc
  • Paper type – resin-coated (RC) or fiber-based (FB)
  • Paper size
  • Toners – used to add warm to cool tones to black and white

Photographic cameras

The camera or camera obscura is the image-forming device, and photographic film or a silicon electronic image sensor is the sensing medium. The respective recording medium can be the film itself, or a digital electronic or magnetic memory.

Photographers control the camera and lens to "expose" the light recording material (such as film) to the required amount of light to form a "latent image" (on film) or "raw file" (in digital cameras) which, after appropriate processing, is converted to a usable image. Digital cameras replace film with an electronic image sensor based on light-sensitive electronics such as charge-coupled device (CCD) or complementary metal-oxide-semiconductor (CMOS) technology. The resulting digital image is stored electronically, but can be reproduced on paper or film.

In all but certain specialized cameras, the process of obtaining a usable exposure must involve the use, manually or automatically, of a few controls to ensure the photograph is clear, sharp and well illuminated. The controls usually include but are not limited to the following:

  • Focus of the lens
  • Aperture of the lens – adjustment of the iris, measured as f-number, which controls the amount of light passing through the lens. Aperture also has an effect on focus and depth of field, namely, the smaller the opening [aperture], the less light but the greater the depth of field--that is, the greater the range within which objects appear to be sharply focused.
  • Shutter speed – adjustment of the speed (often expressed either as fractions of seconds or as an angle, with mechanical shutters) of the shutter to control the amount of time during which the imaging medium is exposed to light for each exposure. Shutter speed may be used to control the amount of light striking the image plane; 'faster' shutter speeds (that is, those of shorter duration) decrease both the amount of light and the amount of image blurring from subject motion or camera motion.
  • White balance – on digital cameras, electronic compensation for the color temperature associated with a given set of lighting conditions, ensuring that white light is registered as such on the imaging chip and therefore that the colors in the frame will appear natural. On mechanical, film-based cameras, this function is served by the operator's choice of film stock. In addition to using white balance to register natural coloration of the image, photographers may employ white balance to aesthetic end, for example white balancing to a blue object in order to obtain a warm color temperature.
  • Metering – measurement of exposure at a midtone so that highlights and shadows are exposed according to the photographer's wishes. Many modern cameras feature this ability, though it is traditionally accomplished with the use of a separate light metering device. To translate the amount of light into a usable aperture and shutter speed, the meter needs to input the sensitivity of the film or sensor to light. Thus there needs to be a setting for "film speed" or ISO sensitivity.
  • ISO speed – traditionally used to "tell the camera" the film speed of the selected film on film cameras, ISO speeds are employed on modern digital cameras as an indication of the system's gain from light to numerical output and to control the automatic exposure system. A correct combination of ISO speed, aperture, and shutter speed leads to an image that is neither too dark nor too light.
  • Auto-focus point – on some cameras, the selection of a point in the imaging frame upon which the auto-focus system will attempt to focus. Many Single-lens reflex cameras (SLR) feature multiple auto-focus points in the viewfinder.

Many other elements of the imaging device itself may have a pronounced effect on the quality and/or aesthetic effect of a given photograph; among them are:

  • Focal length and type of lens (telephoto or "long" lens, macro, wide angle, fisheye, or zoom)
  • Filters or scrims placed between the subject and the light recording material, either in front of or behind the lens
  • Inherent sensitivity of the medium to light intensity and color/wavelengths.
  • The nature of the light recording material, for example its resolution as measured in pixels or grains of silver halide.

Photography

Photography (IPA: [fә'tɒgrәfi] or IPA: [fә'tɑːgrәfi][1]) is the process and art of recording pictures by means of capturing light on a light-sensitive medium, such as a film or electronic sensor. Light patterns reflected or emitted from objects expose a sensitive silver halide based chemical or electronic medium during a timed exposure, usually through a photographic lens in a device known as a camera that also stores the resulting information chemically or electronically. Photography has many uses for both business and pleasure. It is often the basis of advertising and in fashion print. Photography can also be viewed as a commercial and artistic endeavor.

Lens and mounting of a large-format camera
A handheld digital camera.
The Nikon D1, the first DSLR to truly compete with, and begin to replace, film cameras in the professional photojournalism and sports photography fields.

The word "photography" comes from the French photographie which is based on the Greek φώς (phos) "light" + γραφίς (graphis) "stylus", "paintbrush" or γραφή (graphê) "representation by means of lines" or "drawing", together meaning "drawing with light." Traditionally, the product of photography has been called a photograph, commonly shortened to photo.

Lighting In Nature Photography

Lighting is one of the most important factors in taking photographs of natural subjects. Unlike with studio shots where you control the lights and the shadows, taking photos outside is a little bit more complicated. In addition to not being able to control your subject, you also have to take into consideration the elements especially the lighting.

Of course for the seasoned photographer, natural light is no longer a hindrance. In fact, most photographers use light to create great effects and put color into an otherwise drab picture. Hence there are photos that play up the shadows or those that capture the different colors of the sky. This is especially true with landscape shots or those that capture flowers and other objects in the environment.

Light can have a lot of sources. In the morning, there is the sunlight while in the evening, there is the moonlight. There is also what photographers call the natural light, which is not as direct as the two previously mentioned. One can use any of these sources of light. The trick is to know how to use it by angling the camera and the subject to achieve the exposure that you want.

This is often done by studying the effect of the light and its corresponding shadows to your subject. For instance, if you want a more dramatic effect, some photographers will use shadows as their main light instead of the natural light.

There are four main directions that photographers must learn in order to take advantage of the light outside. Overhead light for instance has high contrast and harsh shadows. This is achieved when the light is directly above the subject like when it is noontime. Using lights at the front will result with a flat shot.

This is usually seen with shots that use flash in the camera. Often, pictures shot in this direction will lack depth and dimension. Light at the back, on the other hand, may require an additional fill or reflector at the back to bring out the color of the subject. Often, with a light at the back, the shadows may ruin the photo.

Shooting with the light at the side is perhaps the most recommended when it comes to the direction as this will bring out the texture and the shape of the subject that one is using. For instance, with a light on the side, there will be parts that will be highlighted and parts that are not.